We all use excel for a lot of application and the basic thing that we use this tool is for arranging data in a particular manner. Always arrange data in rows or columns and most of the time the data is arranged in the form of a table. But when we create the table for the first time, it might not have having any kind of borders or linings. A table without a border does not look good and instead, if a border is given, it will provide a better presentation.
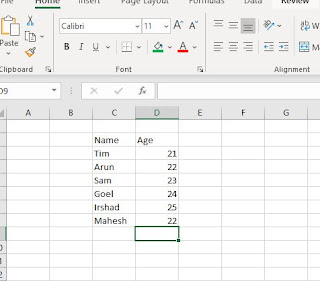
Here we will learn how to provide borders to a table in MS Excel. Let us consider a simple table in MS Excel as given below.
In the above image, we can see a table, that has no borders, and hence it does not provide a good view. So, in order to make it look good, we are going to apply borders. In the below image, you can see a tool for adding the borders which I have marked in red.
When you click on the small arrow on that tool, you will see various bordering options. When you click on that, you will be able to see various bordering options and here we will go for the full bordering options that I have selected, which is visible from the image below.
So we will be selecting the "All Borders" option. But before that we need to select the data that need to be bordered as given below and then go for the bordering options.
Now select the bordering option and you will be getting a neat and bordered table as given below.
Hope that you have understood how to give borders to your data in MS Excel and this can help you a in a great way while you use this tool.
Also view the video below in Malayalam that shows, how to border MS Excel data with Border tool.


No comments:
Post a Comment